Women over 60 stuck in the makeup routine of their 30s and 40s can look haggard and outdated. When applied skillfully, however, makeup can make us look brighter, more polished and well groomed. It can offer a real boost to our appearance as our natural coloring tends to fade with age. The difference depends upon the products and techniques we use.
We share six of the most common makeup mistakes that women over 60 are likely to make. We’ll show you how to fix them as well. The reason we wear makeup is to enhance our appearance so that we look better than our natural selves–we never want to appear as though we are trying too hard.
Mistake #1: Layering on too much foundation
We understand why so many of us make this mistake. As we age, we tend to have more skin imperfections we want to minimize. It only makes sense that we would use more foundation to conceal them.
Applying too much foundation to hide imperfections is one of the most aging mistakes that a woman over 60 can make. Daylight and sunlight are unforgiving. Layering on more foundation just makes us look older. It won’t cover up crow’s feet or wrinkles. What it can do is even out skin tone and make skin look smoother.
The solution
- Begin by looking into a full-sized mirror while having a 7x magnifying mirror on hand. This will give you a good overall sense of your skin’s appearance. Remember, that this is the view that others will see–they are not examining your skin through a magnifying mirror when you are out and about.
- Still looking into your bathroom mirror, dot foundation only on any discolorations on your face—dark spots, broken capillaries, redness across the nose and cheeks (expect to use only a very small amount of product). Don’t start blending with your fingers or a sponge. Instead, use a foundation brush.
[MORE: Buffing your foundation is the key to flawless looking skin]
The brush we recommend is the Mac 170 Synthetic Rounded Slant Brush.
- Don’t wipe the foundation enthusiastically with the brush. Instead, gently stipple the makeup, bouncing the brush on your face.
- Use your magnifying mirror to check any areas that may require further blending. If you start this process with your magnifying mirror, you will be much slower as you try to perfect your coverage.
Mac 170 Synthetic Rounded Slant Brush, $38, Nordstrom
_________________________________________________________
_________________________________________________________
Mistake #2: Skipping the lip liner
Our lips are always on display, especially when we are talking with others. The challenge for women like us is that our lips thin as we age and become less defined. Sometimes, it’s difficult to tell where our lips end and our facial skin begins. Lip liner is important for a youthful look–but not a thick liner that contrasts with the shade of our lipstick.
The solution
The key to having a defined lip is to make sure that both lip liner and lipstick are perfectly matched.
- Apply lipstick first, then carefully define your lip line with the same color lip liner, leaning your pencil on its side to blend the color well into your lipstick.
- This will give you a defined edge without a distinguishable line.
- Never try to draw over the lip line in a effort to make your lips look plumper—it will look like you are trying too hard. A clearly defined lip line will make you look more youthful.
[MORE: Vertical lip lines? Create a smooth look with these techniques]
Many beauty companies sell their lipsticks with matching liners as a set. Maybelline New York’s website features a chart that matches their Color Sensational lipsticks to lip liners.
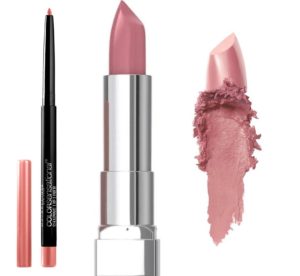
Maybelline Color Sensational® Shaping Lip Liner in Purely Nude; Color Sensational® The Creams, Cream Finish Lipstick Makeup in Born With It.
_________________________________________________________
_________________________________________________________
Mistake #3: Wearing colored eyeshadow
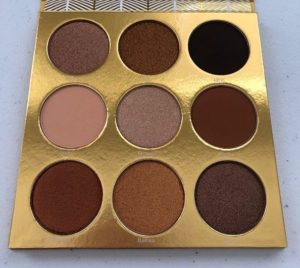
Remember when blue eyeshadow was the standard, regardless of the wearer’s eye color? On a young face, colored eyeshadow can be very attractive. As we age, however, it becomes more difficult to wear color on our eyelids without looking garish. Fortunately for us, earth tones are all the rage at the moment, very flattering and far easier to wear.
The solution
- Use your 7x magnifying mirror to closely examine your iris. If you look carefully, you will see flecks of color in your iris that are not necessarily the predominant color of your eyes. For example, in green eyes, there may be flecks of gold or amber. In blue eyes, there may be flecks of gray.
[MORE: Day to evening makeup in five easy steps]
- Using a neutral palette, pick up the color of the fleck on your eyes.
- Do a sweep of this color across your lid.
- Then add a highlighter under your brow.
Don’t try to use many colors; two will suffice.
Juvia’s Eyeshadow Palette by Juvia’s Place, $19.90 on Amazon.com
Mistake #4: Leaving your waterline bare
You may be wondering what a waterline is. It is the inner lid area that surrounds your eye.
Your upper waterline is found directly underneath your upper lashes. Your lower water line is found directly above your lower lashes. In the diagram of the eye below, the waterline is the rimmed outer part of the model’s inner eyelid. You can see that she is wearing eyeliner on the upper and lower waterline on the outer half of her eye but no eyeliner above or below her lashes.
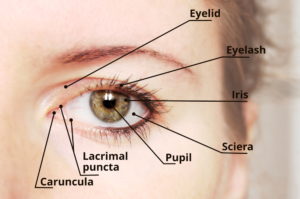
As you age, this waterline becomes more pronounced. Even if you are wearing eyeliner on the upper lid, you will have a bare strip of lid underneath it. This can give an odd, bald-eyed look–a look we can do without as we age and our features become less distinctive.
The solution
Notice the subtlety of this woman’s eyeliner. It is not obvious but it gives depth to her eyes without making her look overdone. Even if you have never tried lining your waterline before, it is easily achievable.
[MORE: Find the best color eyeliner to make your eyes sparkle]
Using your 7x magnifying mirror sit in good light so that you can rest your elbows on a flat surface.
- Using an eyeliner pencil (do not use liquid eyeliner; it will simply wash off) gently lift your upper lashes so that you expose the upper waterline.
- Starting at the inner corner of your eye, sweep the pencil across your upper waterline to the outer edge. Be quick. The longer you take to do this, the more your eyes will water.
- Then hold your lower eyelid away from your eye and rim the lower waterline. Do not rim the entire lower waterline as this will close in your eyes and make them look small. Start at the outer lower corner and rim only ¼ to ½ of the lower lid, as you see in the photograph.
If you’ve never used eyeliner on your waterline, your eyes may water at first so practice at home a few times before you venture out. You will be amazed at how lining your waterline will make eyes pop and how much depth it gives them.
_________________________________________________________
_________________________________________________________
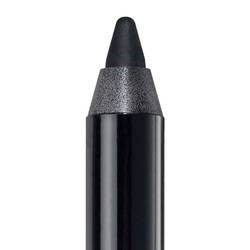
If you think you think this practice is a little strange, you will find lots online about lining your waterlines including wikiHow’s How to Apply Eyeliner to the Waterline. And many companies make eyeliner pencils just for water-lining. A good one is Urban Decay’s 24/7 Waterline Eyeliner Pencil. The product description on the company’s website states: “We specifically developed 24/7 Waterline Eye Pencil for use on the inner rim in the waterline. Our creamy, demi-matte pencil lays down waterproof color that lasts all day.”
Urban Decay’s 24/7 Waterline Eyeliner Pencil, Ulta.com. $22 on Amazon.com.
Mistake #5: Applying too much blush
It’s very common for women our age to use a color that is too dark for our skin tone, and to apply it too low on the face. The goal of wearing blush is to project a healthy glow, as if we had just ran a mile.
The solution
Look at your face in your 7x magnifying mirror.
- Place your upright fingers on either side of the outer part of your eyes.
- About ¾ of the way down your fingers, you will feel the high point of your cheekbones, just below the outer corners of your eyes.
- On each side of your face, begin the application of your blush there, sweeping it back to your hairline.
- Don’t try to put blush on the apples of your cheeks or below this triangle. Blush on the apples of the cheeks works on younger faces but tends to make older skin look florid.
- Apply your blush high and near your eyes.

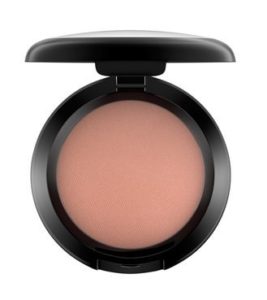
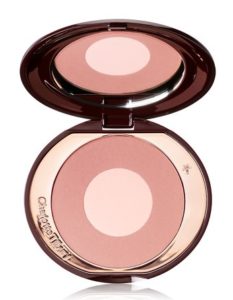
The color of your blush is very important. Subtle is the key. Forget dark or orangey shades; corals and pinks are very flattering for aging skin. Here are some of our favorites, chosen for both color and texture.
MAC Sheertone Blush in Gingerly, $25 at maccosmetics.com
Charlotte Tilbury, Cheek to Chic in Pillow Talk Original, $40 at charlottetilbury.com
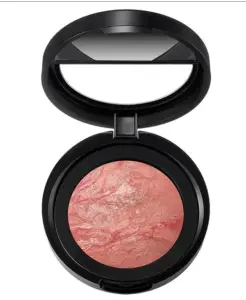
Laura Geller Baked Blush-n-Brighten Marbleized Blush in Starfish Island, $28 at laurageller.com
_________________________________________________________
_________________________________________________________
Mistake #6: Not enhancing eyebrows that have thinned or greyed
It seems that full, luxuriant eyebrows are the purview of the young. As we age, our eyebrows become thinner and greyer until they almost disappear. Bald eyebrows are unflattering and aging as eyebrows are key to framing the eyes.
The solution
There are actually two brow solutions depending on the state of your brows.
- Scenario 1: You still have eyebrow hair. While the shape is good, your brows have greyed, faded or thinned over the years.
If you still have brow hair and are happy with the shape, you can dye your eyebrows. There are many products available that enable you to safely and easily dye your brows back to their original color. The results last for about six weeks. Based on our experience, we recommend two products to consider.
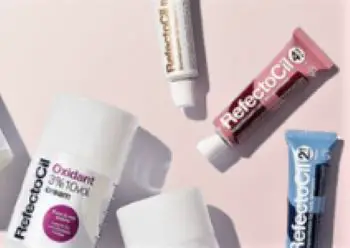
RefectoCil offers permanent coverage and color that last several weeks. It is light and water resistant and available in nine shades. $11 on Amazon.com
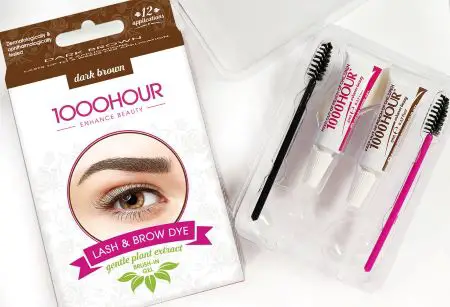
1000 Hour Enhance Beauty Lash and Brow Dye
In four colors, you can tint your eyebrows to match your natural color for a long-lasting look without the use of brow liner. 1000 Hour dyes are safe, effective, and waterproof. $20 at Walmart.
A few caveats when dying your eyebrows:
Regardless of the “cure” time in the instructions, test the color after a few minutes by wiping a small section off and examining it in sunlight. And never, ever try to dye your eyelashes with these products.
- Scenario 2: Your eyebrows are skinny and meagre because you over-plucked them and they never grew back.
You have two choices with this scenario: you can pencil your brows in daily or you can choose a more permanent method such as microblading.
We prefer the penciling choice because microblading pigments tend to change color over time. You will still need to have touch ups regularly if you go this route.
[MORE: Want perfect brows? Here’s how.]
Pencils we’ve tried and like.

Chantecaille Waterproof Brow Definer
This dual-ended brow definer with a grooming brush on one end and a triangular tip on the other gives excellent control to define and perfect your brows. Available at Nordstrom and major department stores, $38
Chanel Sculpting Eyebrow Pencil
This soft, smoothly textured pencil is easy to apply. It shapes and shades perfectly and stays on for long-wearing, natural definition. Available at Nordstrom and major department stores, $29
As an affiliate of Amazon and other retailers, Blue Hare makes a commission on qualifying purchases made through the links on this page.
* * *
You might also like…
Go to the Blue Hare home page to discover more articles for fabulous women.


