The appearance of lush, healthy eyebrows is essential to looking polished and put together. As we age, however, our eyebrows tend to thin and lose definition. And thinning, over-plucked brows can make us look older than our years. It’s not our fault. When we were young thin, sparse brows were in style so we plucked enthusiastically. We didn’t realize that we were damaging the root of the hair until it was too weak to grow back. And even if we didn’t over-pluck, brows naturally become thinner with the years.
It’s a fact that many women who will venture out sans foundation or blush or even lipstick wouldn’t think of going out with bare brows. Why? Because brows frame the eyes and enhance our facial expression.
Over-plucked brows can make us look harsh or surprised or tired. And brows are even more important these days now that we are wearing a mask. Our lips may not show but our brows do.
But all is not lost. You can have full, beautiful brows again (or, at least, the appearance of them) with these brow-shaping, penciling tips. These tips will help you create masterful brows every time you put the pencil to the canvas.
_________________________________________________________
_________________________________________________________
Getting started: The rules and the tools
Use a brow pencil
There are many brow products on the market. They come in pencils, pens, creams and powders. Clare Galloway, our beauty editor, should know. She has been shaping her brows for over 40 years. She’s tried just about every form of brow product and she keeps coming back to pencils. “With creams and powders, the result is very much dependent on the brush that you use,” explains Clare. “If the brush is too flexible or too thick or too thin, you will not always get the desired result. A sharpened brow pencil is the most precise tool. And pencils are quicker and easier to use.” (For Clare’s favorite brow pencils, see below).
Brows should have a head and a tail
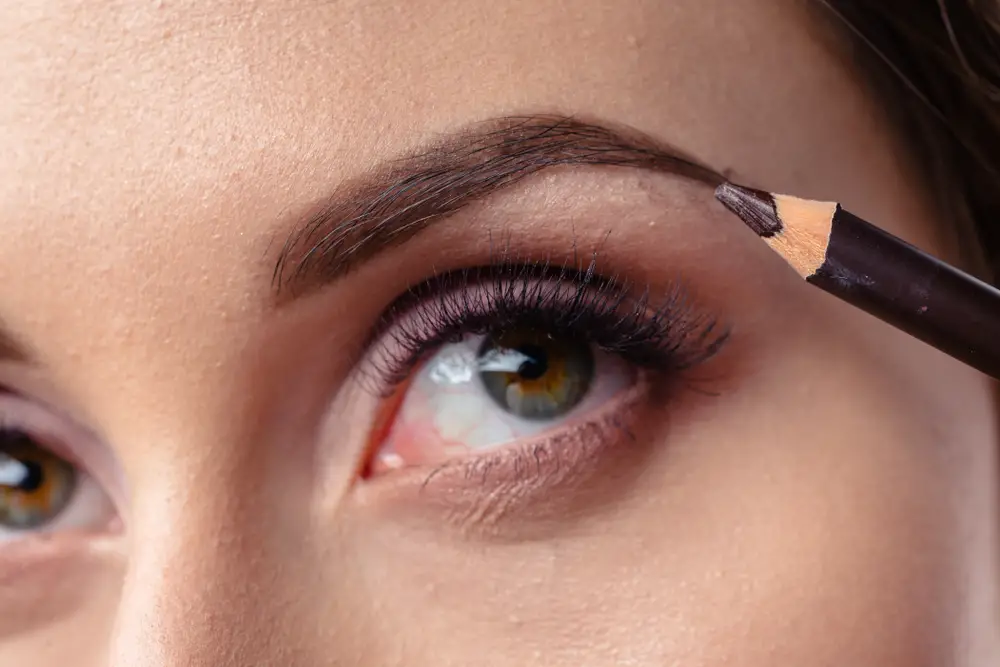
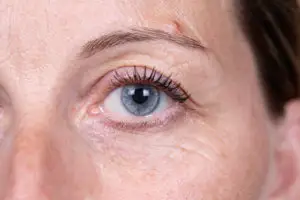
Natural brows have a starting point (the head) and an end point where they taper off (the tail). Notice the brows in our lead photo. They begin thicker at the head and then taper off. Contrast these to the over-plucked brow featured below. The brow is a thin line, about the same thickness at the beginning and the end. It doesn’t have any shape and it doesn’t do anything to frame the eyes.
Your brow pencil should be two shades lighter than your brows
As we age, our skin becomes thinner and more translucent and we start to lose our color. We naturally tend to darken our brows too much in an effort to accentuate them. Remember that, just as hairdressers do not typically recommend that older clients use a darker hair color, the same holds true for brows. It may seem counterintuitive to go lighter but the effect is much more flattering.
Draw short strokes, not lines
Don’t pencil lines where your brows should be. Instead, mimic short hairs by lifting the pencil up often from the surface of your skin as you draw. A line will look like a line. Short strokes will give the appearance of hairs.
No surprises!
We’ve all seen women whose brows arch dramatically upward so that they appear as though they are in a constant state of surprise. Brows should frame the eyes and lend expression to our faces. We shouldn’t look as though we’ve just run into someone for the first time in 30 years. If you have already made the mistake of arching your brows too much, we will explain how you can use a pencil to tone down the arch.
_________________________________________________________
_________________________________________________________
How to build a brow
The following steps are the essential “how-tos” for building your brows.
Step 1 – Use the brow pencil only within the triangle.
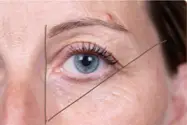
Imagine a line draw straight up from the side of your nose and then diagonally from the side of your nose to your hairline above your ear. You will use your pencil in this area. Don’t pencil your brow beyond either of these lines. You will notice that the head of the brow nearly touches the inner line but that the tail of the brow needs to be extended.
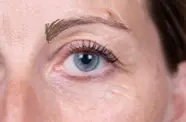
Step 2 – Create or enhance the head of your brow.
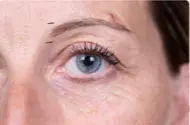
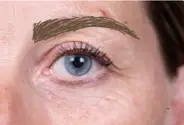
This is a very important step as it guides the shape of your brow going forward. If your brow does not have a defined head, you will need to create one with your pencil. Also, the head of your brow should start on the level with the rest of your brow. You will notice that the beginning of the brow of our model dips down. The first photo shows the space where you pencil the head of the brow. The second photo shows the head of a brow that has been penciled in. Notice that once the head of the brow has been penciled, the arch becomes more exaggerated.
Step 3 – Fill in the arch created by the head of the brow.
Since many of us have plucked hairs from under the brow to give us a thin line, we now need to fill in that area with short hair-like strokes. Notice how we use the head of the brow as the starting point to fill in the bare, arched area. We have also extended the tail of the brow so that the brow frames the eye.
If you are not accustomed to penciling your brows, practice is the key. Remember to use your magnifying mirror in a good light. If you don’t like the results you can always wipe off the pencil and start again. The all-important factor is to choose the right brow pencil. If it is too dark, you will look harsh; if it is too light, you will look washed out.
_________________________________________________________
_________________________________________________________
Favorite eyebrow pencils
Here are three pencils that our beauty editor relies on. They come in universal shades that will work for most everyone.
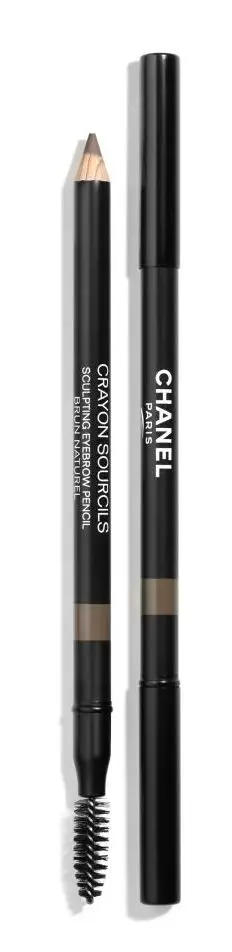 Chanel Sculpting Eyebrow Pencil
“The color, Brun Naturel, No, 30, is a cool mid-brown. It has the perfect pencil consistency and is slightly waxy for long wear. The only drawback of this pencil is that it must be sharpened frequently to keep the point sharp. However, it does come with its own sharpener.”
Available at Nordstrom and major department stores, $29
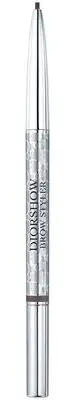
Dior Brow Styler Ultra Fine
“The perfect shade of this pencil from Dior is actually called ‘universal’. It’s very easy to use, the color is perfect, the tip lends itself to mimicking fine hairs and no sharpening is required—just twist it up. While you do not get much product for the money, it’s a superb eyebrow pencil. Expect to replace it fairly frequently.”
Available at Sephora and major department stores, $37
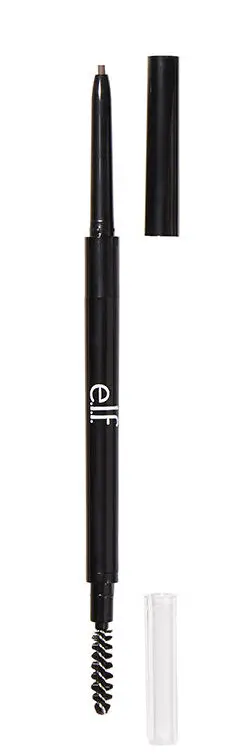 e.l.f. Ultra Precise Brow Pencil
“At $5, this pencil is unquestionably the best value of the three with a quality that rivals the more expensive options. It’s an automatic pencil so it doesn’t need to be sharpened. It has a fine point and is perfect for creating hair strokes. The color, Taupe, is a cool combo of brown and grey. This is a very good pencil if you are on a budget.”
Available at Target and major drugstores. $5
* * *
You may also like
- After-summer skin rescue in three easy steps
- Ageless beauty: Secrets of French skin care
- Eyebrows disappearing? See if microblading is for you.
Go to the Blue Hare homepage for more articles for fabulous women