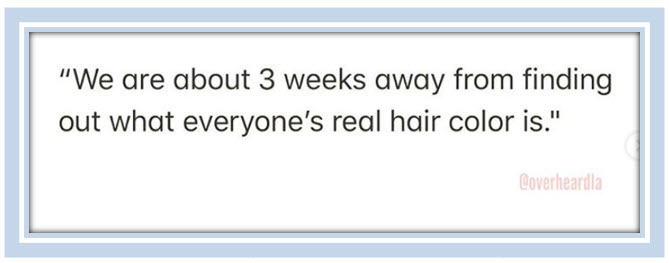
A number of quarantine memes are making the rounds on the internet, including this Instagram post by @overheardia: “We’re about 3 weeks away from finding out everyone’s real hair color.”
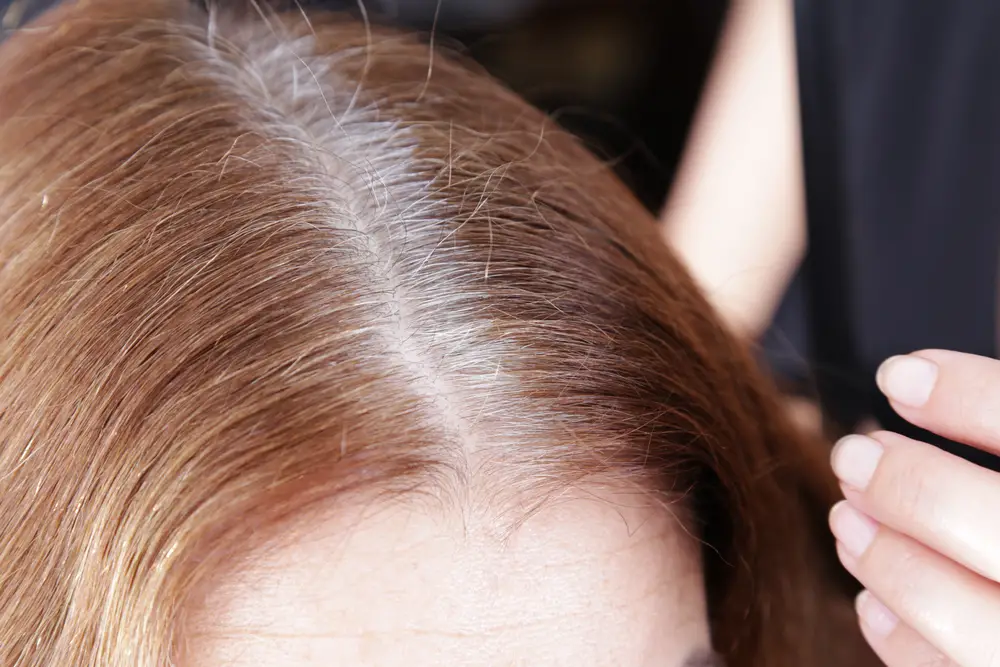
It’s no joke, though. Most salons are still closed (and not likely to reopen for weeks), leaving many of us in self-isolation with a strip of gray that grows wider by the day. We’re faced with a choice: live with that silvery stripe or touch up our roots at home.
The temporary approach
If you are chicken about dyeing your roots yourself and you are determined to wait out the virus, there are some very good temporary root touch up products.
One Blue Hare friend swears by a product called WOW. Wow Root Cover Up is a mineral powder, not a spray. The product comes in a compressed compact, which makes it easy to apply–like eyeshadow or blush powder. It comes with a small brush that enables a very precise application that is not possible with a spray. The color does not come off on bedding or pillow cases and it looks exactly like hair. Price is approximately $30.00
Another reader, a veterinarian in Maryland, swears by L’Oréal’s Magic Root Cover Up in an easy-to-use spray formula. Watch Eva Longoria use this spray to cover up her gray roots in literally minutes. Price is approximately $8.00
The permanent approach
If you are one of the lucky women who do your own color, you probably have your situation under control. Same for those who go to a salon and were smart enough to anticipate that perhaps you should take a supply of your color home. Then there are the rest of us.
We are the ones who regularly get our roots touched up–a painstaking process that involves coloring only the gray roots while leaving the rest of our hair alone. That’s where a skilled technician comes in. Alas, we are not that. But our advice to you if gray roots are bringing you down: do try this at home.
Blue Hare’s beauty editor, Clare Galloway, found herself at this crossroads a few weeks ago. With the help of her husband, Ken, she undertook a DIY root touch up and shares what she learned here.
First: Get a box/bottle of color
The first thing I did was find a good source for a hair dye designed to work with gray hair. Many hair salons offer kits for curbside pick-up that include their client’s customized hair color and all the tools. Call your hairdresser to see if they provide such a service or, if not, where you can get your color.
- Color&Co from L’Oréal offers personalized hair color, created with professional-grade color pigments, rich conditioners, and shine-boosting ingredients. For $26.90 you will receive your custom color, cream developer, stain block and eraser, conditioner, gloves, and a reusable brush.
- dpHUE has a root touch up kit with a selection of seven colors from strawberry to black. The kit can be found at com, Dermstore.com, and dpHUE’s website for around $30.
- eSalon designs a color specifically for you. A colorist factors in your color goals, photos, profile, and hair history to craft your color and assign your developer strength. Your color is then mixed with drops of pigments to make your individual color. eSalon has created over 194,000 unique combinations to date. A kit with your personalized color costs $27.50.
- Madison Reed offers 50 different shades of color crafted in Italy by master colorists. A tube of Radiant Cream Color and bottle of Conditioning Color Activator cost $26.50, less if you subscribe. Madison Reed also will assemble a complete home coloring kit that includes color and coloring tools.
Color kits are selling out like crazy, as you can imagine, so you may need to search for available outlets.
If your hair is shoulder length or longer, make sure to get enough color. You don’t want to be in the middle of the job and run out. You can always keep color you don’t use for the next time.
And do save major hair changes for when you can get back to your salon. This is not the time to transition from black to platinum. “When dyeing your hair yourself, stay within two shades, lighter or darker, of your current color,” says Kari Hill, a celebrity colorist at Mèche Salon in Los Angeles. “Remember that your result will be somewhere between your natural color and the photo on the box.”
Recruit an assistant
If you are quarantining with someone between the ages of four and 80 enlist them to help. It’s not the easiest thing to reach the back of your head, especially with a brush full of a drippy color agent. An extra pair of hands will greatly assist this effort.
Get organized
You will need:
- Wide brush with a rat tail for painting roots
- Bowl for mixing
- Two pairs of gloves (one pair to apply color and a fresh pair for when you are ready to rinse)
- Vaseline or clear lip balm
- Your phone (for the timer)
- Plastic cape, smock, towel, or old shirt
Amass your beauty PPE
You are going to make a mess—that’s a given. If you have porous floors like tile or natural stone you will need to cover them. Use an old sheet, drop cloth or even garbage bags on your bathroom floor. Do the same with your bathroom counters and sinks.
Then cover yourself. If you use old clothing for your cover, use something that buttons down the front so you don’t have to pull it over your head. (Or go naked. That way, when you are ready to rinse off the color, you simply jump into the shower. Hair color comes off skin a lot easier than fabric or other materials.)
Protect your face, ears, and neck
Since you don’t regularly dye your hair yourself, and this may be your first time ever, you are going to get dye on your face, particularly along your hair line. To protect your skin, glide a clear, solid lip balm all around your hairline, including around your ears and the nape of your neck. That way, color won’t fuse with your skin and will be much easier to wash off. You can always use Vaseline, of course, but it is goopier and not as easy to wash away.
Lay out your tools
Think of an operating room scene from Grey’s Anatomy. That is how your tools should be laid out. You do not want to be halfway through the process and then realize that you forgot something. That could mean that color stays on longer than it should in one spot while you shuffle through your stuff to find what you need. Check and then double check that you have everything organized before you start.
Make a plan
The night before you plan to color your roots, practice sectioning out the order in which you are going to dye. Try separating a few strands of dry hair with your rattail brush and practice fake-painting color onto the gray.
If you have recruited someone to help, have them section out the back hair and separate it from the front so you can see how much hair you have to do. (If they are up for doing your whole head, all the better.)
The plan will help you determine the order in which you will proceed (e.g., side, side, back) and familiarize you and your recruit with the process. If you must do the back yourself, position yourself so that you are looking into a mirror in front and a mirror behind.
Ready? Go!
Your color kit will come with instructions to mix and apply the color, timing for the application(s), and how to rinse. This is where your two pairs of gloves come in. Use one pair to put on the color and developer, then switch to a clean pair to wash your hair.
Applying the color with the wide rat tail brush was relatively easy. I was worried about not getting to the crown of my head and the back. But since we had the dry run the night before, my husband knew what sections he needed to do—including around my ears. I must admit that I was impressed with the great job my husband did on the back of my head, but it makes sense because he is a perfectionist. (That’s not always a quality that’s easy to live with but it sure paid off in this exercise.)
I popped my hair into a plastic shower cap to prevent dripping. The wait time for “curing” went by quickly. The normal waiting time for curing the color at the salon is 40 minutes. Since I’m not a professional–who applies the dye in a snap–it took me much longer to apply the color. That cut the cure time down to 30 minutes.
To rinse, I stepped into the shower and let the water go directly onto my head. Then I carefully scrubbed around my hairline with shampoo, then shampooed a second time, followed by conditioner. It’s really important to use a good conditioner and to leave it on as long as you can.
When I took off the turban and looked in the mirror, that awful skunk streak was gone, along with the gray at my temples.
The next day my hair felt wonderful. The fresh color and the absence of gray roots was worth the effort. It definitely lifted my spirits.
Lessons learned
- I used a demi color rather than a permanent one. Because it was the first time I DIY’d touching up my roots–and I was nervous about the results–I used a semi-permanent rather than a permanent color. If you want good root coverage, the best color is permanent.
- I did not put enough color around the hairline and on the crown of my head. My colorist saturates the top of my head and hairline with color since they fade first. Next time, I will make sure these areas are better covered with color because it did fade fairly quickly.
- I didn’t mix the color and developer properly. Instead I squirted the entire bottle of color into the mixing bowl, then poured in the entire amount of developer. The lesson learned (remembered later from my colorist’s routine) is that you squirt a small amount of color and developer into the bowl, mix, and then keep repeating until the required amount of both is in the bowl. This results in fewer lumps and more evenly mixed color.
- I stained the countertop because it wasn’t covered properly. I covered the floor but forgot the counter where the bowl was sitting. No matter how careful you are, color is going to drop off your brush—it does at the salon as well and they know what they are doing. Next time I’ll make sure the whole route from bowl to head is covered. That way I’ll be able to enjoy the results of my DIY hair—without agonizing over those stains on the tile.
Is there an easier way to hide my roots?
Obviously, a hair color that you shampoo in over your entire head is much easier than fiddling with the roots. However, if you have highlights, you don’t want to cover them with an all-over color. That’s where companies like eSalon, Madison Reed, and Color&Co come in. They claim their products result in a multi-dimensional, multi-tonal color that gives the appearance of highlights while still covering gray at the roots. They have a quiz online that you take to determine the best color for you.
Now that you’re an expert
Maybe not an expert, but experienced. Now that I’ve been through the process of touching up my own roots I’ll be rebooting at home more often. It’s a smart move–we can all save both money and time, even when things get back to (the new) normal.
***
You may also like
- Build your lung capacity with deep breathing
- Feeling squirrely? 12 ways to stay active when you’re quarantined
- How to boost your immunity if you’re over 60
Go to the BLUE HARE home page for more articles for fabulous women